Years ago, my wife and I lived in a tiny apartment just north of New York City. To say that we didn’t have much space would have been an understatement.
The apartment complex we lived in did not have a gym, and we had to find ways to do apartment workouts without annoying our neighbors. For the year we lived there, we found several different apartment workouts we could do, using very minimal equipment.
This article shares five apartment workouts and routines you can do in your apartment. These apartment workouts are ones we have either done in an apartment, or ones we wish we did knowing what we now know.
Your own workout and routine will depend on your preferences and space limitations. If you’re unsure where to start, I’d recommend reading the following resource, where we were named an expert on Apartment Guide. Read the full article here: 7 Guidelines for Building a Home Gym in Your Apartment.
My preference, based on experience, function, and trying to maximize your limited space, is a combination of both bodyweight and kettlebell training.
Combining bodyweight and kettlebell training allows you to workout in a tiny space while adding weight resistance. In my opinion, the kettlebell gives you way more movement options than a dumbbell while providing the power and explosiveness of barbell training.
Kettlebell training is an absolute home gym space saver. It’s the most versatile home gym that can fit entirely under your bed.
With bodyweight, all you’ll need is a pull-up bar*. With kettlebells, you’ll need at minimum one, and maximum three to start.
Lastly, before getting into the apartment workouts, I want to make the case of why you should move beyond bouncing between random workouts and have an actual workout routine.
To illustrate this, consider how you approach making dinner.
A workout routine is like a recipe. It tells you what ingredients you need, how long you need to prepare the meal for, and the instructions to follow to get your delicious dinner. It’s an organized way to get your desired result.
Following random workouts without a programmed routine is like throwing a bunch of random ingredients into a pot, mixing them together, and hoping that the meal turns out to be tasty. Pun kind of intended, this approach is a recipe for a disorganized and potentially disastrous dinner.
With that in mind, I want to share with you 5 apartment workout routines that you can follow in your apartment, right now.
This is a bodyweight routine I put together, available to Fit Tip Friday subscribers (it’s free to sign-up). This workout routine increases your strength by focusing on just four basic bodyweight movements, with three weekly sessions, and each workout is 30-40 minutes.
Since you’re in an apartment, you can ditch the jump rope… unless you do want to annoy your neighbors.
This is an excellent book written by Mark Lauren, who is a Navy Seal and runs a company named after his book.
This book is what my wife and I actually followed when we lived in our NYC apartment. This book teaches you the basic of bodyweight movements, while providing you with detailed routines you can follow.
What I like about Lauren’s routines is that they are scalable depending on your own skill level. If you are a novice, there’s a plan for you. If you are intermediate with your strength, there’s a plan for you. If you are advanced, there’s a plan for you.
This is another excellent book, and this one was written by Pavel Tsatsouline, who runs a company named StrongFirst.
This is the book I wish I had when I lived in that NYC apartment. This book teaches you a routine with kettlebells that, true to its name, is both simple and sinister.
This routine is so basic it’s almost laughable, but this program delivers. You will do a combination of both kettlebell swings and kettlebell get-ups, almost everyday, and your strength will absolutely soar.
This is a free workout routine I put together that combines bodyweight movements with the basic kettlebell movements (kettlebell swings, kettlebell goblet squats, etc…). It requires three weekly sessions, and each workout takes 30-40 minutes to complete.
Each workout is simple, easy to follow, and requires only one kettlebell to start.
Maybe you already have a workout routine that you follow. If so, you can add this free 8-week core program on top of what you are already doing.
This is a bodyweight core program that requires only 3 sessions per week, and each session takes less than 10 minutes to do.
ApartmentGuide is a subsidiary of Redfin.com
*These are affiliate links, and as an Amazon associate I do earn on qualifying purchases. These are resources I have actually used, and ones I continue to recommend.
]]>
With the popularity of home improvement shows in the last few years, DIY projects are a familiar concept. We’ve all felt the tug to renovate or have spent the capital to plan and complete improvement projects that we can do ourselves in our homes.
What I’m calling DIY fitness follows that same framework. A “Do-It-Yourself” approach to fitness is the activity of stewarding and strengthening your body without the regular employment or 1/1 coaching from a professional.
Admittedly, the DIY fitness journey is never done in absolute isolation. You will always be learning from others, either from videos, podcasts, books, relationships, etc… However, the goal of this learning is for you to be able to develop the base knowledge, skills, and information that you need to take care of your own body.
Even the most competent DIYer knows when to call in a professional.
If a home has systemic issues that need further evaluation, it’s best to call in a professional for further evaluation. If there’s a project that requires the advanced skill of a plumber or electrician, the DIYer will save money, time, and pain along the way by partnering with a professional to have the work done.
Same thing goes for your body. If you have a chronic health condition, are recovering from an injury, have regular pain, have musculoskeletal problems, or are completely brand new to fitness, I’d encourage you to seek the advice of your primary care physician and partner with a certified coach before starting any workout plan.
And if you are a healthy and active individual, you will still gain a lot of value in learning from professionals. Some prefer this almost exclusively, and most (especially at the beginning) need some guidance and a plan to help them get started.
My point is this. Even the most experienced DIYer is humble and wise enough to know his own limits. He knows the value of professional advice and will pay for it when needed.
We’ve never had as much access to information as we have today. We can step into any realm of information instantly with only a few seconds of internet searching. This access to information makes DIY fitness entirely possible.
Yet at the same time, the overwhelming amount of data makes DIY fitness harder than ever. Discerning the helpful fitness sources from the harmful or ineffectual ones takes work and experience. The fads and charlatans of the fitness industry line the video and search feeds, which turns the fresh springs of information out there into a moldy project.
While the swamp of information makes navigating the fitness space harder, it does not make it impossible. We still have immediate access to experts in a variety of fields that no prior generation had access to. We just need to learn how to discern the helpful from the harmful.
Here are some principles that have helped me navigate through all the noise to DIY my own fitness.
Most DIY projects have a defined objective and scope, like how to remove and replace a bathtub, how to lay down flooring in your kitchen, or how to power wash the siding on the exterior of your home.
The principle applies to DIY fitness. Identifying your objective, or your mission, is the first step in your DIY journey. Do you want to lose weight? Build muscle? Pursue longevity? Increase mobility and flexibility? Reduce pain? Develop strength? Bulk up?
Narrowing in on your objective determines your starting point with your building project.
If the objective is the “what”, the motivation is the “why”. You begin a DIY project for a specific reason. The shower floor has a crack in it. The addition of a bathroom will add value to your home. An open layout of a kitchen adds warmth and space for your family.
Same goes for fitness. You want to lose weight, build strength, or pursue longevity, but what are the underlying motivations?
I write to the Christian guy, and as Christians there are motivations we have to take care of our bodies. Here are some:
Once these motivations are clear, discerning through the wealth of information becomes easier. Here’s how you can use these motivations to navigate through all the content at your fingertips:
DIY websites have an assortment of guides for improvement projects, and YouTube university often has the entire project done by someone else that you can follow along with.
Same goes with fitness. Between YouTube, websites, blogs, podcasts, and books, you can find answers to any of the fitness questions you may have.
If you want to take the DIY approach, this discovery will take longer for you than if you were to work with 1/1 with a coach. A coach will provide you the exact information you need for your context, and if you decide to do it yourself, you will have to learn (mostly through trial and error) what works and what doesn’t.
Here are some resources that have helped me that you can use:
Once you know your building project’s objective, why you are doing it, and have your guide handy, you need to pick up that hammer and get to work.
Same goes with fitness. Some people define the objective but never think about the why, and they fall off track. Others do the soul-searching, but don’t know where to start with fitness. Others do all the research, but never actually get started. And others actually get started, but never finish.
Wherever you find yourself in this spectrum, something that’s helped me is remembering that little ant from Proverbs 6.
The ant is a tiny creature, but Solomon uses it as an instructive example for the snoozy sluggard. Here’s what the ant teaches us:
Almost two years ago I wrote a post on this. And nearly 100 posts later, I think the DIY fitness framework is the better answer for this question.
Layman’s Fitness exists to help the man in the pew steward his body for God’s glory. And after two years, this website has produced:
But at the end of the day, only you can swing it. And I hope you do that with all the strength you have, to the glory of God.
]]>
Kettlebell training is a mode of exercise that uses the ultra-versatile, extra-portable, and compound-movement friendly kettlebell for your training goal. Using this cannonball with a handle can completely transform your training, as it did mine.
Almost a year ago, I was stagnant in my home gym routine. I wanted to add some weight into my bodyweight training, but I was tired of the monotony of dumbbells and didn’t have the space for barbells.
I stumbled across a video of someone doing kettlebell complexes (here’s an example of one). The rhythmic flow with a very heavy weight intrigued me, and I was immediately hooked. Several books, programs, and almost a year later, I’ve been kicking myself that I didn’t incorporate kettlebell training into my home gym routine sooner.
In this prior post I wrote about kettlebells, I shared a list of 7 benefits of training with this tool. Here are three reasons of those reasons to help you started.
The kettlebell is an ultra-versatile tool suitable for any training goal.
Do you want to lose weight?
Do you want to build muscle?
Do you want to improve mobility?
Do you want to develop functional fitness?
Do you want to strengthen your cardiovascular system?
Identifying your goal is the very first step with kettlebell training. The kettlebell can help you accomplish any of these training goals.
Kettlebells can be transported and used in just about any location. You can take them to your local park, on the beach, on a mountain, in your living room, etc… This affords you the opportunity to take your gym with you anywhere you can drive, all while only taking up a few square footage of space everywhere you use them.
After years of training with dumbbells, I was used to isolating muscle groups in my training sessions with Bicep curls, Tricep extensions, forearm curls, etc… While I enjoyed strength training, these movements always felt disconnected from the day-to-day movements in real life.
After I started kettlebell training, it wasn’t long before I noticed the small correlations between kettlebell movements and everyday life… picking up one of my kids (Clean), hinging down to pick up something from the floor (Deadlift), putting a heavy object on a shelf over my head (Get-up, Press), carrying groceries or a suitcase (Farmer’s Walk) etc…
While of course the kettlebell does not precisely mimic our everyday movements, the closer connection utilizing mostly compound movements made me enjoy my training sessions more.
The movements of kettlebell training can generally be divided into three categories: ballistics, grinds, and hybrids. All of the following movements have a linked video page on the LF Hub, which is a free resource you can use to study and improve your form in over 50 exercise movements.
Kettlebell ballistics are movements that are explosive, dynamic, and rhythmic. Ballistics are typically completed in a high-rep range, which can strength your cardiovascular system and burn some serious calories.
Here are some examples of kettlebell ballistics:
Kettlebell grinds are movements that are slow, controlled, and powerful. Grinds are more similar to power lifting movements and are typically completed with a lower-rep range, which can build muscle, increase strength, and improve mobility.
Here are some examples of kettlebell grinds:
Kettlebell hybrids are movements that are a mix between kettlebell ballistics and grinds. This movement patterns can help strengthen your cardiovascular system, increase strength, build muscle, and improve mobility.
Here are some examples of kettlebell hybrids:
To begin, you will need to identify your training goal. Do you want to lose weight? Build muscle? Focus on longevity and function? Strengthen your cardiovascular system?
The good news is that kettlebell training is suitable for any of these goals. I’ll give you an example to help you get started.
Based on what I now know, if I could have gone back to when I started training with kettlebells and set my training goal, here’s what I would have done:
Develop strength, mobility, and cardiovascular health with kettlebell swings and kettlebell Turkish get-ups.
Here’s why and how.
Swings are a ballistic movement that builds posterior chain strength and mobility, strengthens your aerobic system, and shreds your core. Get-ups are a grind movement that strengthens every muscle in your body, teaches you balance, and forces you to focus on your breathing while you exercise.
In other words, you get a complete, full-body workout with just these two movements. This dramatically simplifies your training and weight selection.
Yes! Pavel Tsatsouline wrote his Simple and Sinister Program, which uses these two movements, and will keep you busy for months! The training time only takes 20-30 minutes per day, at about 4-6 sessions per week. The goal of this program is to help you complete:
If you want to learn more about this program, you can also read my post on it called the minimalist exercise routine that works.
(Some of these links are affiliate links, and as an Amazon associate I earn on qualifying purchases)
The answer to this question depends on your goals, current mobility and strength, and proficiency with technique.
In general, here’s where I’d recommend starting:
For beginners, your primary objective will be to learn form and technique with each kettlebell movement prior to adding weight.
How much weight you will add depends on your goals, current mobility and strength, and proficiency with technique. However, if you’re following the Simple and Sinister Program, then here’s the weight advancement you can follow.
Ah, interested in stocking your home gym? I made a few mistakes when I started purchasing kettlebells, so I wrote a Kettlebell Buying Guide you can use to avoid the same mistakes I made.
Kettlebell training has been an enjoyable experience for me. I’ve built muscle, leaned out, and developed full body mobility and strength. It’s been a fantastic method to use to exercise, and I hope you also can use it to crush your own goals.
]]>
While they may seem like a fringe exercise modality, kettlebells have increased in popularity over the last several years due to their versatility in just about any space, from the most basic home gym to the most decorated commercial gym.
And for the home gym user, they are the ultimate minimalist home gym training tool. However, they can add up quickly in cost. I made several purchase mistakes at the beginning of my own kettlebell training that have cost me both time and money.
I’ve also read several other online kettlebell buying guides. Some are great, but others are cluttered with whirring ads, they require you to squint through sensory overload, and they provide no direction or resources on what you actually do once you buy a kettlebell.
So, hopefully, this kettlebell buying guide can save you both money and time in the long run, while giving you the information and direction you need to spend more time learning how to use that cannonball with a handle.
There are two main kinds of kettlebells: cast iron and competition. I’ve listed the pro’s and con’s of both, and then some thoughts on the “other” category (plastic, adjustable, etc…).
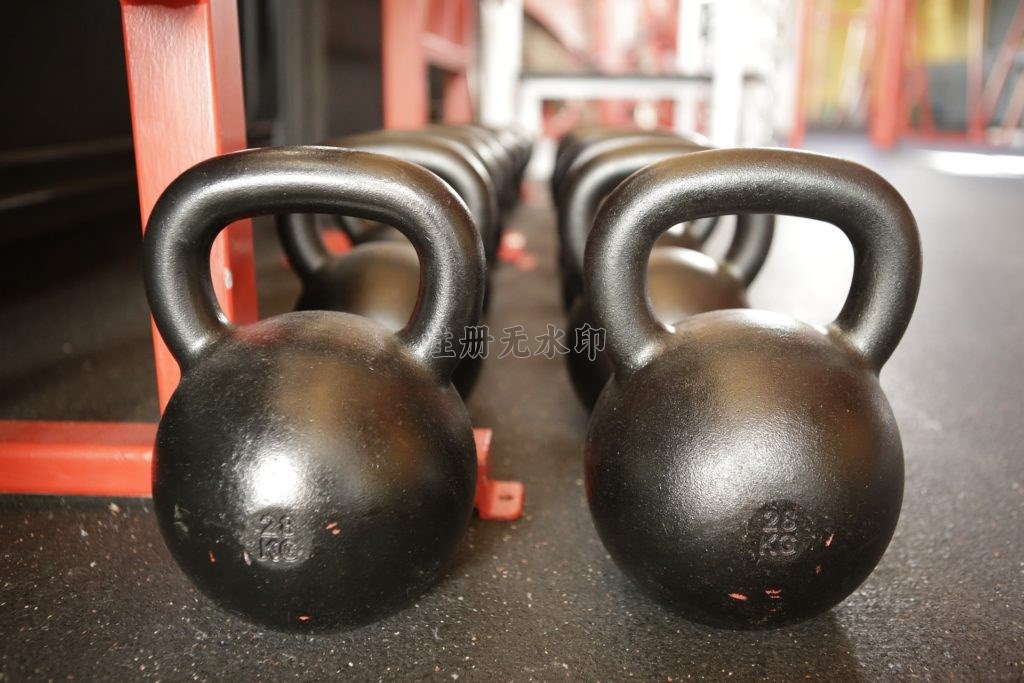
Cast iron kettlebells are popular, and quality ones will last you a long time. High-quality cast iron bells will be single cast and made from non-scrap metal. There are a lot of different types of coating for cast iron kettlebells, including vinyl, epoxy, or powder coating.
I enjoy and recommend the powder coating kettlebell, as it holds chalk better and has a smooth but not oily feel, which helps with gripping and maneuvering.
Pro’s:
Con’s:
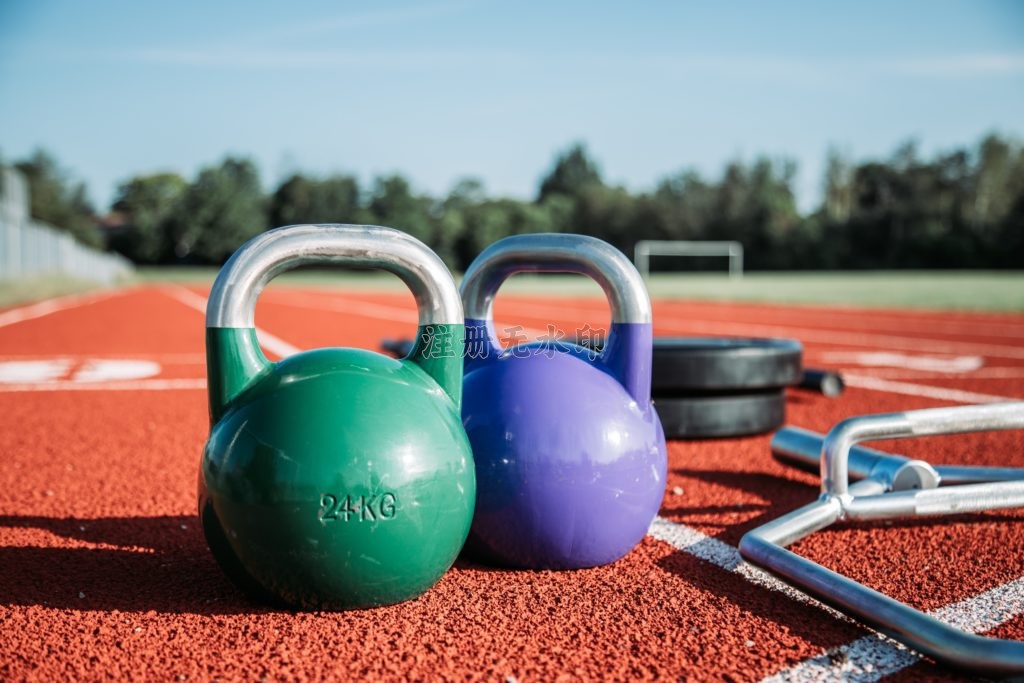
There is an official kettlebell sport, and in this sport, competition style bells are used. They are made from steel and are another popular purchase option.
Pro’s:
Con’s:
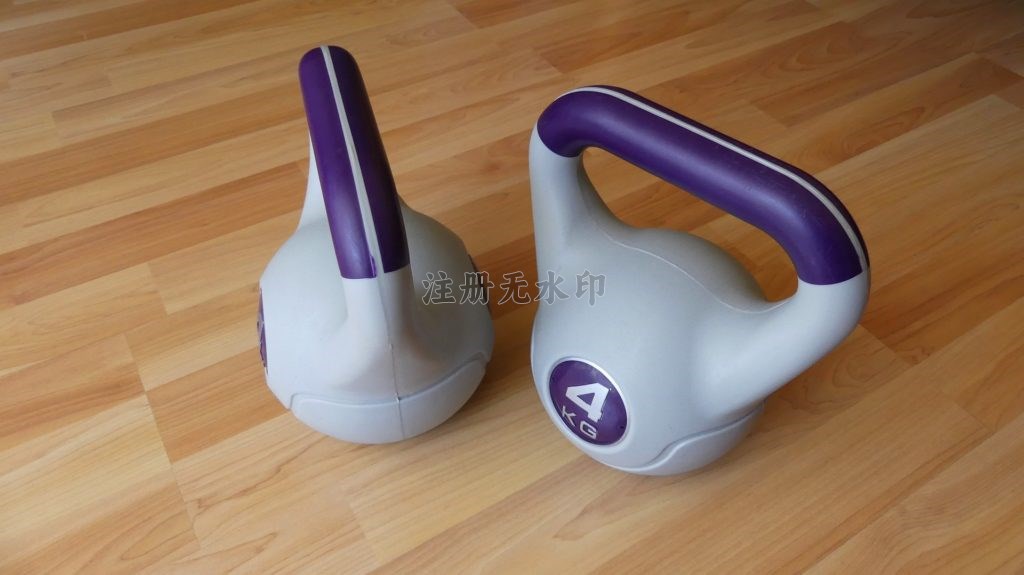
This is where a kettlebell buying guide can help you save time and money. If you are interested in training with kettlebells, I would suggest you start with a cast iron or competition kettlebell and avoid plastic or adjustable kettlebells.
Plastic kettlebells are cheaper, but cheaper can come at the cost of quality. I personally do not enjoy the sharp ridges around the plastic kettlebells, and the cast iron or competition kettlebell will feel a lot better on your hands and forearms.
With adjustable kettlebells, you will need to watch out for clanging or rattling when you move them. And inevitably, at some point in your kettlebell training, you will drop your kettlebell, and it will need to be able to withstand impact to the ground. So, if you go with the adjustable option, be sure to find one that is high quality and won’t break on impact.
Finding a quality kettlebell brand is the surest way to ensure that you are buying a quality kettlebell. The company behind your kettlebell purchase is making all of the decisions that go into creating a quality product, and it’s important to find one you can trust.
In the next section of the kettlebell buying guide, I’ll share some thoughts on what to look for in a brand, but for now here are some criteria that can help guide you toward a quality kettlebell:
For cast iron and competition kettlebells, a quality kettlebell will be made of iron or steel (not scrap metal), and it will use single casting (not multiple casts with a weld). A quality make ensures durability so that you can get a longer life and use out of your kettlebell.
Kettlebells are an expensive purchase. You might spend anywhere from $3 to $8 per kilogram for a kettlebell, so you want to purchase one that will last you not just months, but years. Putting your dollars into a product that is of higher quality will save you money in the long run.
With feel, this primarily has to do with how the kettlebell horn feels in your hands and how the sides of the kettlebell feel on the backside of your wrist and forearm.
For your hands, you’ll want a smooth horn with sides and curves that don’t have sharp edges or sharp metallic bumps. When you are doing your 83rd kettlebell swing in a row, the feel of the kettlebell horn becomes kind of important, and you’ll want a horn that won’t slice into your hands.
For the backside of your wrist and forearm, you’ll want a kettlebell that has well-rounded sides. Kettlebells generally have their branding and weight stamp on the side, and when you do snatches, presses, or get-ups, that means the back of your wrist and forearm will be rubbing against that branding and weight stamp. The rounder the kettlebell, the better it will feel on your wrist and forearm during those movements.
Here are my three “must haves” and my two “nice-to-haves” when evaluating a kettlebell brand.
Find a brand that offers weights that you can grow with. Once you get used to a brand’s feel and you want to start going heavy, it can be challenging to adjust to another brand’s bell at a heavier weight.
Are all the cast iron bells they make single cast? Are they all made from scrap metal or the good stuff? Do they offer guarantees or warranties? Price tends to communicate quality, so what do their prices communicate? And, the best way to diagnose quality…
This goes without saying, but product reviews tend to reflect how well a company serves its customers, and public product reviews are a way for the consumer to monitor that.
A brand that understands kettlebells and its users will know its core customer base might have an interest in competing in kettlebell sport.
Offering a coaching or training program tells me that a brand knows its products well enough and cares about its customers to the point that the company wants them to enjoy its products safely and effectively.
Based on these criteria, the brand I recommend and personally enjoy using is Kettlebell Kings.
Started in 2012, Kettlebell Kings is U.S. based business (Texas y’all) and is a provider of high-quality kettlebells, training programs, and accessories.
Here are just a few of the other brands out there:
This depends on skill level, experience, strength, etc… But here are some general recommendations.
The most important thing when starting kettlebell training is to learn the form and mechanics of each movement. I’d encourage you to forego starting heavy so that you can practice proficiency with the mechanics of each movement first, and then progress to heavier weights when you are ready. Also, seek advice from your doctor or physician before starting an exercise program, especially if you have pre-existing conditions.
The answer to this question has more to do with your training goals and regimen than anything else. The general rule of thumb is to increase your weight by either 4kg or 8kg increments.
This is where I made my biggest purchasing mistake… I started purchasing lighter kettlebells in 4kg increments without having a clearly defined training plan or goal. So hopefully the next section in the kettlebell buying guide will help you save both time and money in the long run.
While this is a kettlebell buying guide and not a kettlebell training guide, before you start purchasing kettlebells you need to identify your goals and plans on how you want to use them. Again, not having a clear plan at the beginning of my kettlebell training was my biggest mistake that cost me both time and money.
Kettlebells are celebrated for their versatility, for good reason. They can help you achieve any fitness goal. Do you want to lose weight? Kettlebells can help. Do you want to build muscle? Yes, kettlebells can help. Do you want to focus on longevity and function? Kettlebells can help. Do you want to strengthen your cardiovascular system? Kettlebells can help.
If I had to do it all over again, I would have made my first kettlebell training goal to develop technique and strength with kettlebell swings and kettlebell Turkish get-ups.
Here’s why and how.
Swings are a ballistic movement that builds posterior chain strength and mobility, strengthens your aerobic system, and shreds your core. Get-ups are a slow grind that strengthens every muscle in your body, teaches you balance, and forces you to focus on your breathing while you exercise.
In other words, you get a complete, full-body workout with just these two movements. This not only simplifies your training but also simplifies your kettlebell purchase decision.
With this training goal, you can start with just a few kettlebells. Here are the weight recommendations:
Absolutely. Pavel Tsatsouline wrote his Simple and Sinister Program, which uses these two movements, and will keep you busy for months! The training time only takes 20-30 minutes per day, at about 4-6 sessions per week. The goal of this program is to help you complete:
If you want to learn more about this program, you can also read my post on it called the minimalist exercise routine that works.
At first, I thought that too.
What changed my mind is when I tried to do one kettlebell get-up with a 32kg bell… the challenge of just one heavy get-up convinced me that this was not an easy program.
Also, it’s not as boring as having a newly purchased kettlebell sitting idle for months without use because you don’t have a plan. That untouched kettlebell is most definitely bored.
After my own research, experience, etc…, here are the 3 brands of kettlebells I use regularly, and they all sit happily used in my garage. I also recommend having hand chalk and mats for kettlebell training.
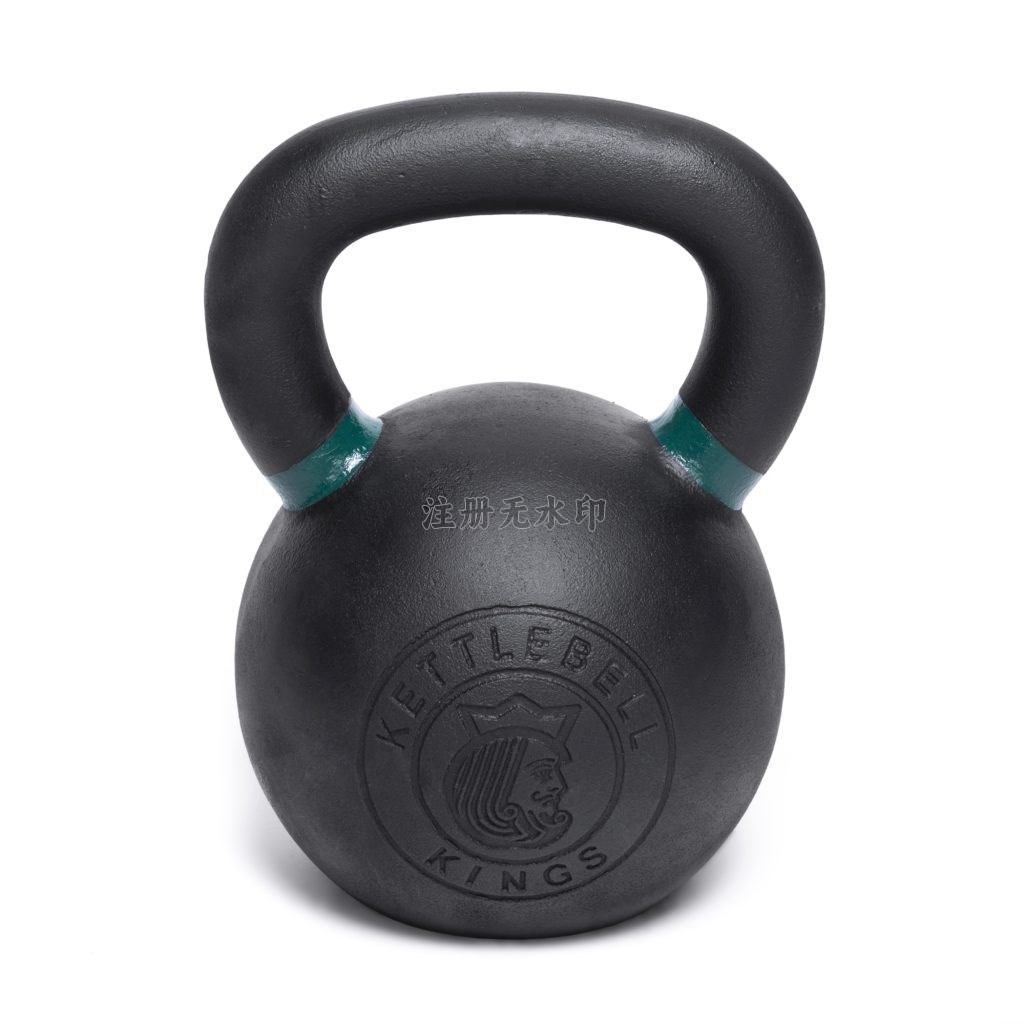
Kettlebell Kings is a U.S.-based business (Texas y’all) that sells premium kettlebells, and their powder coat kettlebells are my recommended quality purchase. This is a premium buy in terms of make, feel, and durability. I have two 24kg, one 32kg, and one 48kg Kettlebell Kings’ bells in my garage.
Pro’s:
Con’s:
Lifeline was the very first kettlebell I purchased. After reading through dozens of reviews and comparing prices across several brands, I bought my first kettlebell with Lifeline. For a lower-priced kettlebell, it does the job and I’ve overall been satisfied with it. I have all sizes in 4kg increments from 8kg to 24kg.
Pro’s:
Con’s:
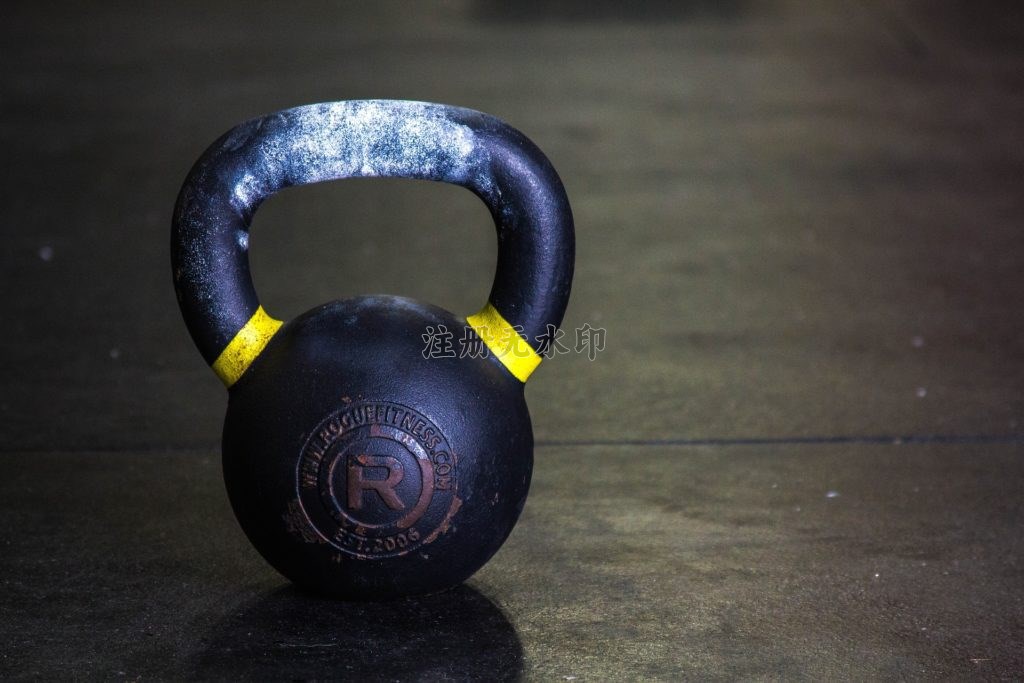
Lastly, if you are looking for an in-between, I’d recommend buying the Rogue Kettlebell. This is another quality buy in terms of feel, make, and durability. I have one 40kg Rogue Kettlebell in my garage.
Pro’s:
Con’s:
Hand chalk ensures that your hands can still grip and maneuver the bell when wet with sweat. I didn’t think I needed chalk until I started doing one-hand kettlebell swings with a heavier bell in the summer. Once I felt the sensation of the kettlebell almost leaving my hands due to the sweat… I quickly ordered this chalk.
Pro’s:
Con’s:
Kettlebells are metallic and heavy, and they can damage your flooring on impact, which is why I strongly recommend you purchase a mat to use while slinging bells. Also, if you do kettlebell get-ups you will want a more comfortable surface under your elbows and back. There are so many exercise mat options out there, but these mats are almost identical to the ones that sit in my garage.
Pro’s:
Con’s:
The most important thing at the beginning of kettlebell training is to learn proper form, and technique and build base strength in the primary kettlebell movements. Here are some resources that can help you.
The LF Hub is an exercise movement resource library for kettlebell and bodyweight training. There are 15 posts describing each of the primary kettlebell movements, along with detailed instructions, a video, and application ideas. All you need to do is click the “Kettlebell Exercises” tab and start learning!
You can also click the “Programs” tab on the LF Hub or click on these links to the LF 4-Week Kettlebell program and the LF 8-Week Home Gym Strength program, both of which feature the kettlebell.
I’ve already recommended this program, but I can’t recommend it enough. This program really delivers. It just requires two movements (the kettlebell swing and the get-up), each workout takes 20-30 minutes, and it’s a patient but diligent path to building strength.
This was the very first book I purchased by Pavel Tsatsouline, who is often credited as popularizing the kettlebell in the U.S. He provides a lot of great movement instructions and theory in this book, along with a program you can follow.
I hope this kettlebell buying guide has been helpful in distilling and introducing you to some of your purchasing options as a kettlebell consumer. The kettlebell is a phenomenal training tool, and I hope you enjoy it as much as I do!
Note – some of these links are affiliate links, and as an Amazon Associate I do earn on qualifying purchases.
]]>
Maybe you’re like me. Maybe not.
Maybe you have young kids, a marriage, a full-time job, and time constraints, but you want to spend some time each week exercising.
Maybe you don’t mind going to the gym, but you want to find a routine you can do at home. And maybe you’re on the hunt for a new routine, but you don’t want something that’s going to take hours each day.
You just want an exercise routine that’s simple. It doesn’t have to be flashy, but it certainly needs to work. It needs to be efficient and effective.
That’s exactly where I was about a year ago. I was getting a little bored with bodyweight-only workouts, and I was looking for something new I could do at home. That’s when I stumbled across kettlebell training, and found a routine that fit everything I was looking for.
Before we get into the program, let me share some definitions.
While I don’t consider myself a true minimalist, my pursuit over the years of efficiency with exercise has led me down this minimalist journey as a skeptical but interested participant. Over the years I’ve constructed what I consider to be a minimalist home gym, and have pursued minimalist workouts with a learner’s appetite. So, here’s what I’ve learned about minimalism, especially as it pertains to exercise.
Minimalism with exercise is about reducing excess in your training and maximizing the utility of the essentials. Put another way, it’s about using simple equipment and a simple process to take care of your health. It’s about only using the materials you need, and making energy and programming decisions that maximize your training outcomes.
So, a minimalist exercise routine is a structured, thoughtful, and programmed implementation of efficient exercise strategies with simple equipment.
Pavel Tsatsouline is considered to be one of the key influences in bringing kettlebells to the US. And when I started kettlebell training, I read as many of his books as I could.
His book and training program called “ ">Simple and Sinister” is hands down the best minimalist exercise routine I have ever done. I will review his program and approach in this article, but I *strongly encourage you to purchase the book and study his training principles for yourself.
This is an affiliate link, and as an Amazon Associate, I do earn on qualifying purchases. But I cannot recommend this program enough. This $20 spend is a small purchase that will earn you a massive return. It’s a minimalist buy.
Pavel’s program uses only 2 exercises, and the workouts are just as simple. Each workout takes about 20-30 minutes. And here’s the program.
Most days during the week complete:
In terms of weekly sessions, it’s recommended to do absolutely no less than two sessions per week, but ideally almost every day (somewhere between four and six). When I did the program, I was following the routine about five to six times a week for about four months.
Depending on your current skill and strength level, you will start with either one 16kg kettlebell or one 24kg kettlebell. If you are new to kettlebell training or have questions on purchasing your first kettlebell, I put together this kettlebell buying guide to help you navigate through some of your initial questions. Kettlebells are a great training tool, but they can add up quickly in cost!
With this program, you will slowly but regularly mix in movements using a kettlebell at a higher weight, until you can achieve the Simple and then the Sinister standards.
The Simple Standard is met when you can use a 32kg kettlebell and complete 100 one-hand kettlebell swings in 5 minutes, take a 1-minute rest, and then complete 10 Kettlebell Turkish get-ups in 10 minutes.
The Sinister Standard is met when you can use a 48kg kettlebell and complete 100 one-hand kettlebell swings in 5 minutes, take a 1-minute rest, and then complete 10 Kettlebell Turkish get-ups in 10 minutes.
When I first heard about Pavel’s program and started researching it, I honestly scoffed at it for being “too simple”. I mean, only two exercises? Just two? The same movements for months? And why the Kettlebell Turkish Get-Up? No thrusters, cleans, snatches, or squats?
I remember the day I realized how brutal this program actually is. After weeks of trying to write my own minimalist exercise routine, I realized that more experienced trainers have already done this successfully. I went back to Pavel’s books, picked up Simple and Sinister, and ordered my 32kg kettlebell.
The day my 32kg kettlebell arrived, I tried to do one Turkish Get-Up with it. The amount of total body strength and control it took to maneuver that 32kg cannonball smoothly just once through the movement shocked me. As the Simple Standard requires 5 Get-Ups on both sides in under 10 minutes, I realized this program was way harder than I thought it would be.
I read Pavel’s book a few times, studied the principles, followed his training protocol, and about four months later I hit the Simple Standard with the 32kg kettlebell.
Here’s what I learned from that process.
Without giving away all of Pavel’s secrets (again, I encourage you to buy the book), you should know that he does not rush anything. He employs step loading, which is a strength-building strategy that moves you up through heavier weights systematically over a long period of time, and in this case, several months.
To follow this program, I began with a 24kg kettlebell (as a side note, beginners will likely start with a 16kg; I had already been training with kettlebells for months). I added only a few reps each week with my 32kg kettlebell, stayed with that mixture for about a month, and then added a few more reps each week for the next month. And repeated that process, inching up, plateauing, then inching up again.
After about two weeks, I quickly realized that I had been conditioned for wanting quick results with my training. I wanted more reps with my 32kg bell than what the program had prescribed for me. I wanted to work my max weight and max reps every session. And I wanted fast results.
This program does a great job of forcing you to slow down and work through a long process. There are no hasty gains. It’s a diligent path towards gain (Proverbs 21:5). And it worked.
About three months into the program, something strange happened. The 32kg kettlebell didn’t feel as challenging on my Swings, nor as heavy on my Get-Ups. I started to be able to move through the daily training sessions without getting as winded.
I kept at the regular, rhythmic programming and continued to slowly mix in those weightier reps with the heavier bell. And before I knew it, the 32kg kettlebell felt light enough to where I decided I was ready for the Simple Standard.
But the remarkable thing is that months after following the program and finishing the Simple Standard, that 32kg still feels easier with my Swings and Get-Ups.
As a former rock climber, I remember how hard the days were after I returned to the climbing gym after taking just a week off. My fingers and forearms seemed like they had lost their maximum strength after they weren’t used in the same way for a short period of time.
Not so with this training program. On most days, even months after finishing the program, I can still pick up that 32kg bell and complete the Simple Standard. This phenomenon is called “owning the bell” and is a key principle in Pavel’s program. This minimalist exercise routine teaches you patient strength building so that once you hit the Standard, you really become strong.
This plays to the program’s strengths and weaknesses. This program only requires two exercises, it takes only 20-30 minutes, it can be done anywhere, and it actually works.
You will need to invest in kettlebells for the Simple Standard (16kg, 24kg, and 32kg), and then 40kg and 48kg if you want to get to the Sinister Standard. But the program only requires one kettlebell of each weight, and there are limitless possibilities with kettlebell training, even if you only have one 16kg, 24kg, and 32kg kettlebell.
The downside of a program like this is you are investing most of your workout time into just two exercises. Swings and Get-Ups are some of the absolute best exercises you can do, but this program does feel restrictive at times. What I ended up doing is adding a few sets of pull-ups and push-ups a few times a week after my sessions.
After finishing the Simple Standard, I took some months off from that program and started experimenting with Snatches, Squats, and Thrusters. I did this to change things up in my routine, but also to build strength with other kettlebell movements.
But now, I’m ready to simplify my routine once more and start working towards the Sinister Standard goal with the 48kg bell.
If you are looking for a minimalist exercise routine, I encourage you to pick up Pavel’s book and try working through the Simple and then to the Sinister Standard. Don’t be fooled by its perceived simplicity. It’s sinister as it comes.
Enjoy!
*As always, it’s recommended to consult your physician before beginning any exercise program.
]]>
Minimalism is a word on the move. Like a fresh fad, it’s being sprinkled on top of anything and everything. There’s minimalist art, minimalist lifestyle blogs, minimalist podcasts, and now here we are talking about minimalist workouts.
While I don’t personally consider myself a minimalist or part of that movement, my pursuit of efficiency with the exercise tools I have in my home gym led me down the minimalist path as a curious wanderer. I’ve experimented with different programs, including this minimalist exercise routine that I highly recommend, and I’ve tried all sorts of different training modalities.
So here’s what I’ve learned, and here’s a layman’s stab at a definition, especially as it pertains to exercise.
Fundamentally, minimalism is about reducing excess and maximizing the utility of the essentials.
With exercise, the goal of minimalist workouts is to simplify your equipment and pursue your exercise goal with well-placed energy use. It’s simplicity with your workout materials and simplicity in your workout process. And from a Christian worldview, the goal of minimalist workouts is to steward your body to the glory of God with simpler materials and with a simpler process.
As you’ll soon see, the following minimalist workouts all have the kettlebell sprinkled in them. There are other great resistance modalities you can use (barbell, dumbbell, TRX, etc…), and the true minimalist will likely just go for bodyweight workouts.
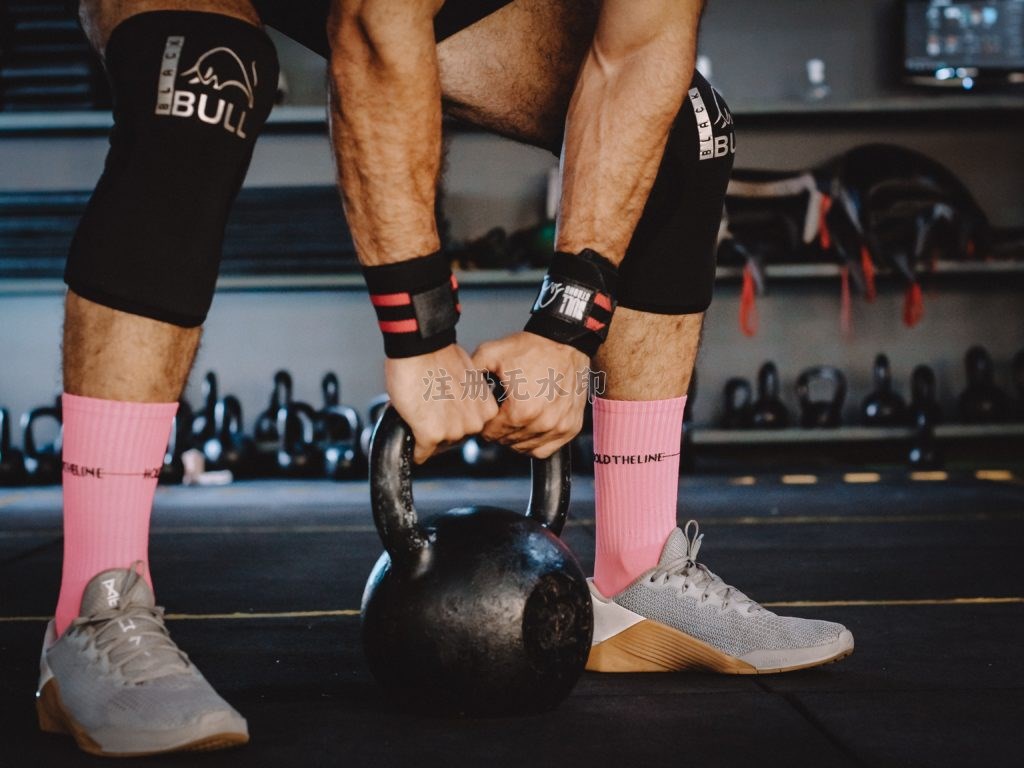
But from my view (and from years of experience with a home gym), if you want to move beyond bodyweight workouts, the kettlebell is the ultimate minimalist training tool. It’s ultra-versatile, portable, scaleable, efficient, and effective. It’s the home gym that can fit under your bed, and it can simplify your materials and simplify your training process.
Kettlebells are a phenomenal training tool, but they can add up quickly in cost. If you are new to kettlebell training and have questions on buying your first kettlebell, I put together this kettlebell buying guide to help you navigate through some of those initial questions.
Here are 10 minimalist workouts. These workouts are all written to require only the most basic equipment that you need in order to build your own minimalist home gym. Additionally, the equipment needed for these minimalist workouts is likely available in most local gyms.
All of the minimalist workouts are performed on and linked to the Layman’s Fitness Youtube Channel, and most of the exercises are linked to their video instruction page on the Layman’s Fitness Hub.
I used five different methods to write these 10 workouts (two workouts per method) for a total of 10 minimalist workouts. The methods and tips are explained below for each workout pair.
In 20 minutes, do as many rounds as possible of:
In 20 minutes, do as many rounds as possible of:
AMRAP stands for “As Many Rounds As Possible”. With the AMRAP method, you will be completing as many rounds as you can within a defined period of time, which is usually between 20 and 30 minutes.
You can get a full-body workout using the AMRAP method. But the key is proper variable selection. Here are some tips:
Do 5 Rounds of:
Do 5 Rounds of:
5×5 is a popular method with various interpretations and applications. This is one of my favorite methods for minimalist workouts. For the purpose of this article, when I say 5×5 I’m referring to a workout that has 5 rounds with 5 movements.
You can get a great full-body workout using the 5×5 method. Here are some tips:
Do 10 Kettlebell Swings every minute on the minute.
Alternate 10 One Hand Kettlebell Swings every minute to make it harder.
Every 2 minutes do:
EMOM stands for “Every Minute On the Minute”. This is an interval training method. With EMOM training, you will be completing a certain number of sets for a certain number of exercises within a defined time interval.
While the EMOM interval is usually 1 minute, you can expand your interval to 2 or even 3 minutes to include more exercises or more repetitions. Here are some tips:
The Tabata is another type of interval training, only with more volume in a shorter amount of time. With a Tabata, you will be doing 8 intervals of 20 seconds of work with 10 seconds of rest, for a total of 4 minutes of work.
Tabatas give you a lot of options. Here are some tips:
This is the Simple & Sinister workout, which is a book and program by the same name written by Pavel Tsatsouline (this is an affiliate link, and as an Amazon Associate I earn from qualified purchases, but I cannot recommend this book enough!). I did this program last year and hit the Simple Standard, and it was well worth the purchase.
This is also a simple and sinister workout. Start by doing 30 burpees every day (~5x a week) until that feels easy. Then go for 50 burpees per day. I did this a few years back for several months… and got shredded.
I saved my favorite method for last. So kudos to you if you’re still following along and still interested in minimalist workouts. This last approach seems so basic, but it completely transformed my training over the last few years. With a skills-focused approach, select just a few compound movements, do those movements almost daily, and strengthen your body’s ability to perform those movements.
Fundamentally, this is what powerlifters do with the barbell; they deadlift, press, and squat. But this selectivity can be done with other modalities. The Kettlebell Get-Up. Pull-ups. Burpees. Here are some tips:
Enjoy!
]]>
My wife and I generally hawk our meal choices for ourselves and our children. Especially this year, due to health issues, we have been incredibly conscious of what goes on our plate.
We have been reading and researching all things food. One of the resources we have continually turned to is the book Beyond Labels by Joel Salatin and Dr. Sina McCullough. You can also read my post on the problems with counting calories, inspired by one of the Beyond Labels chapters.
(Some of the links are affiliate links. As an Amazon associate, I earn on qualifying purchases. I can’t recommend the Beyond Labels book enough!)
That book has been slowly transforming our meal choices. However, the moments between meals or after meals… that’s what typically gets me.
Snacks. Drink choices. And desserts. I like them all… they are the trio of tantalizing temptations.
My tendency is that I lack self-control when it comes to these choices, and that’s where my calorie intake, from a nutrient density perspective, suffers the most. I’ve had to learn what substitutes to make to continue my healthy eating choices in the space that orbits around a meal.
So, if you’re like me and find yourself getting tempted in the margins between meals, here are 3 easy swaps you can make to win in the in-betweens.

For our weekly discipleship group, we tend to have chips and salsa on hand for a group snack. Which means large bags of chips tend to set in our pantry.
Tortilla chips… paired with salsa or queso (we live in Texas)… that is my snack downfall.
But what has been working as a substitute throughout the day is organic peanut butter with organic fruit.
The benefits of eating organic v. non-organic deserves more attention than what I can give here, but if you go the peanut butter and fruit roue, I’d recommend making sure both have that organic label.
Costco’s organic peanut butter brand has been my go-to, and it goes well with either organic apples or organic bananas. You will want to buy a peanut butter brand th at only has one or two ingredients: organic roasted peanuts, and maybe some salt.
Organic peanut butter is a great source of protein, vitamins, and minerals. Just watch out for added sugars. Combined with organic applies (and or organic bananas), the pairing is a great balance of protein, fat, carbs, and fiber.
Massive amount of low-nutrient density calories are consumed through liquids everyday in America. Sodas. Energy drinks. High-sugary sweet teas. Alcoholic beverages.
One of the most basic but effective changes you can make is swapping out those beverages for water. And it will surprise you how much water you should actually be drinking. In fact, if you are like most Americans, you are probably under-consuming the water that you need every day.
While studies disagree on the percentage of Americans that are chronically dehydrated, the number that’s floating out there is 75%.
The general recommendation for daily water intake is:
I do think that there is an appropriate time and place for something sweet. But unregulated and regular amounts of sugar is terrible for your body. So dessert needs boundaries.
But what if you just “absolutely need” something sweet mid-week?
For whatever reason, I find myself with this craving either Tuesday or Wednesday evenings after the kids go to bed… so here’s what I’ve turned to.
Organic unsweetened Greek yogurt (whole milk), and add your own raw organic honey. Add organic fruit if you’d like (organic berries, apples, etc…). Adding chia seed is optional too.
Greek yogurt is high in protein, is great for muscle recovery, and has probiotics/bacteria that can help with your gut health. Just purchase an unsweetened, organic variety (with whole milk), as the added sugars in most sweetened yogurts will blow your mind. By adding your own raw organic honey, you get to control how much sugar enter your body.
]]>
To me, nutrition is extraordinarily convoluted. Cited studies contradict each other, trends and fads regularly enter and exit acceptance, and everyone has their own opinion when it comes to the foods they either will or won’t eat.
I always recommend that you do your own research, and/or consult your doctor or nutritionist.
Recently I’ve been trying to educate myself in this space, and one of the resources I’ve turned to is “Beyond Labels” by Joel Salatin and Dr. Sina McCullough.
(This and some of the following links are affiliate links. As an Amazon associate, I earn on qualifying purchases. But I can’t recommend the Beyond Labels book enough… it’s been my go-to resource lately!!)
One of the chapters in the book covers calories, and challenges conventional thinking about whether or not we should count calories. Some of the insights blew my mind.
After reading this chapter and doing some of my own research on it, I want to share three considerations you should make when counting calories.

First, some definitions and context –
A calorie is a unit of energy. It’s the total energy required to raise the temperature of a gram of water one degree Celsius.
Caloric count in food was originally measured this way through the use of a bomb calorimeter. Food was burned, and the rise in water temperature in the bomb calorimeter was measured to estimate how many calories are in food.
Here are three things you need to keep in mind when you count calories.
Your body might harness 300 calories from a meal one week, but only 230 calories from that same meal the following week.
How is this possible?
Your digestive system is incredibly complex, and is impacted by several factors. In Beyond Labels, Dr. Sina McCullough shares this list of internal and external factors impacting digestive system efficiency:
When we measure calorie count, we are not considering all of these other factors. We are assuming that our bodies take the same amount of energy each time from each meal.
This is a very robotic and mechanical way to view our bodies. God has created us far more complex than that (Psalm 139:14).
The FDA requires caloric measurement on food labels… but it’s not as precise as you might think. In fact, the calorie count can be off by 20% and still be in compliance with the FDA.
This means you have a 40% range of error; that 500 calorie meal could actually be 400 calories, or it could be 600 calories, but the 500 calorie label would be considered “in compliance”.
This makes it challenging to measure how many calories you are actually consuming. Layer on the sliding efficiency of your digestive system (point 1), and counting calories with exactness and precision is almost impossible.
A 12 oz Coke as 150 calories in it, which is about the same calorie count as two large eggs.
From a calorie perspective, both foods are the same. But they are vastly different in composition.
We know this intuitively. But when we are hyper-focusing on counting calories, we need to remember food quality, and the countless ways the food you eat interacts with all of your body’s systems.
Soda is pure sugar. There’s no fiber, minerals, or vitamins. Your blood sugar elevates after consuming soda, which causes insulin to be released by your pancreas. High insulin increases inflammation, raises blood pressure, and can increase the storage of belly fat.
Eggs are a nutrient dense food, with vitamins, minerals, amino acids, and antioxidants. They increase HDL (“good” cholesterol), have the antioxidants lutein and zeaxanthin which can help with eye health, and they have choline which helps with neuron activity.
On paper, calorie count is deceptive. There is more going on than just energy.
The point of all this is that counting calories is not as exact as we might think, and food quality is a far more important consideration than calorie count.
When reading all this, the question I kept thinking about was weight loss. It’s commonly accepted that operating at a calorie deficiency (calories out > calories in) will lead to weight loss.
But is that true?
In short, based on the research I’ve read (just examples – 1, 2, 3), I think it’s true.
Here’s where we really enter the nutritional maze.
If consuming less calories than you burn leads to weight loss, but measuring calories is not as precise as we think it is, and food quality is actually more important, how in the world can we pursue weight loss with precision?
And interestingly enough, I think you already know the answer.
Even if experts and nutritionists disagree about counting calories (and they do!), all will likely agree that eating more organic whole foods will cultivate a healthier you.
In Beyond Labels, Joel and Sina share a simple definition for organic whole foods:
So, is the answer to count calories of organic whole foods that you eat?
You could. But interestingly enough, you might not need to.
Dr. Sina shares a fascinating study from 2019. The adult participants were split into two groups; one group ate an ultra-processed diet for 14 days, then switched to an unprocessed diet for 14 days. The other group started with the unprocessed diet for 14 days, then switched to the ultra-processed diet for 14 days.
Both groups were told to eat as much or as little as they wanted.
The result?
Both groups consumed an average of 500 calories more when eating an ultra-processed diet, and consequently gained an average of 2 pounds. And both groups consumed an average of 500 calories less when eating an unprocessed diet, and consequently dropped an average of 2 pounds.
Again, from Beyond Labels, when we start eating organic whole foods:
Like I said before, do your own research in this space.
But in that research, try exploring the world of organic, whole foods through changing what’s on your plate, and see what happens.
]]>
Creating your own workouts is a skill that you can learn. It’s like the skill of writing; it requires familiarity with mechanics, technique, form, edits, and lots of practice.
This article will teach you how to write a 20-minute, full-body interval workout. Interval training is a technique that cycles through work and rest over a defined period of time. The type of interval training this article covers creates a workout that will help you feel energized instead of completely depleted at the end of your sessions. This is perfect for the busy parent who is strapped for time.
I recommend picking compound exercises that work most if not all of your muscle groups. You can cycle in movements that isolate specific muscle groups, but with compound movements you will get the biggest bang for your time buck.
Example: Kettlebell Swings, Goblet Squats, Burpees, Mountain Climbers, Pull-Ups, Push-Ups, Plank-Ups, Kettlebell Cleans, Squats, Presses, Get-Ups, etc… Pick 2-4 of these compound exercises.
Give yourself 20-30 seconds of work in each interval. This means that you will need to do a low rep count for each exercise (1-5 reps each).
Example: 2 Goblet Squats, 1 Clean/Squats (each side), 2 Burpees
This step is critical. Once you finish your 20-30 seconds of work, take 30-90 seconds to rest. The general rule of thumb is you are ready to start the next interval of work when you caught your breath and can talk again. At this pace, you should feel like you can do this for longer than 20 minutes.
Repeat this cycle for 20 minutes, and at the end, this should leave you feeling energized instead of depleted. This type of interval training applies some really interesting science on energy pathways.
Example: 20 Minutes
Repeat this process 3-4 times to create 3-4 workouts. Complete each of those workouts once a week, for four weeks. At the end of the month, write a new set of workouts. Rinse, repeat, and have some fun with it.
Here are 3 workouts that use this type of interval training. All three videos have been posted to the Layman’s Fitness YouTube channel.
Now that you know the structure for writing these types of workouts, here are some of the key principles and tips behind executing this type of interval training.
Think about each repetition as an opportunity to practice perfecting your form. Maintain your form with each movement. The better your technique is, the more intensity you will be able to add in the future.
Remember to breathe, in through your nose and out through your mouth. Breathing this way, especially during your rest periods, will help you recover.
With your 3-4 workouts, make sure at the end of the week you have hit all the major muscle groups in your body (upper body, lower body, core, etc…). With compound movements you will hit most if not all of your muscle groups, including your core.
Examples:
I’ll say it again. Diligence is your goal. Aim for consistency, build the habits, and the results will come. Practically, this looks like completing 3-4 sessions, each week, for one month.
When you are finished with one month, write 3-4 more workouts, and start again. Pick some new movements. During the second month do one workout a week that goes to 30 minutes. Have fun with it. Use this as a tool to apply stewardship, learn skills, and build strength to the glory of God.
]]>
Kettlebells were always an odd exercise instrument to me.
They were always stashed in the corner of every gym I went to, collecting rust and dust. The color variations were all over the place; they were either a bright plastic-looking blue or a dark metallic black. They were always lined up next to each other, like Russian dolls, observing the gym goers preferring barbells, dumbbells, pulley machines, and treadmills over the cannonballs with handles.
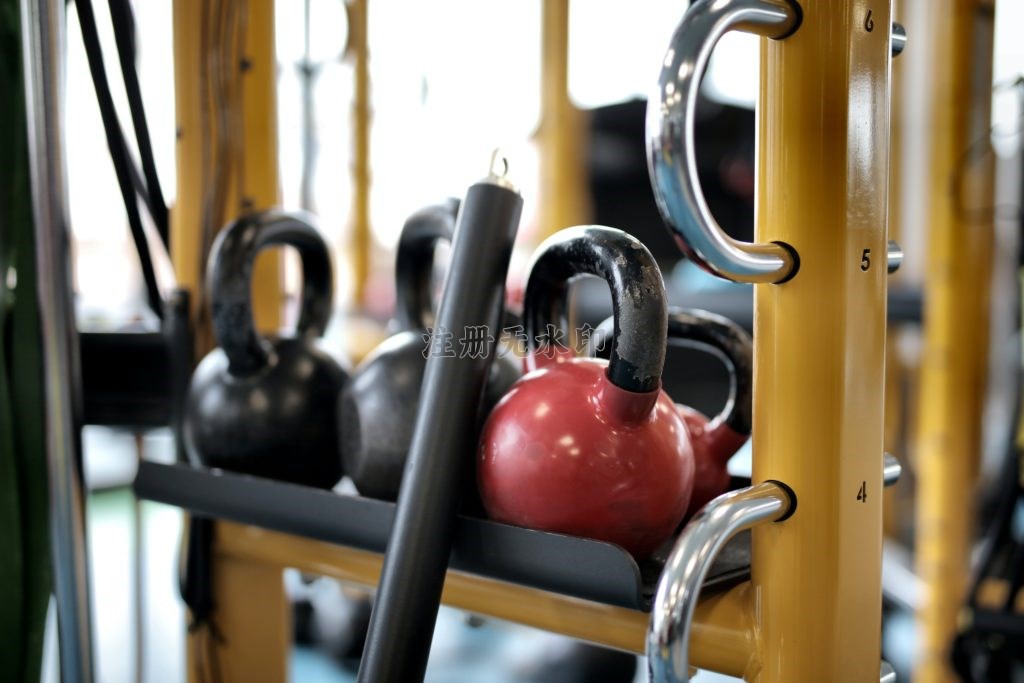
I had a few kettlebells that sat largely unused in my home gym for years. Every now and then I would carry one for 20-30 minutes for a Farmer’s Walk, but that was the extent of my use of them.
Almost a year ago, I was stagnant in my home gym routine. I wanted to add some weight into my bodyweight training, but I was tired of the monotony of dumbbells and didn’t have the space for barbells.
I stumbled across a video of someone doing kettlebell complexes (here’s an example of one). The rhythmic flow with a very heavy weight intrigued me, and I was immediately hooked. Several books, programs, and almost a year later, I’ve been kicking myself that I didn’t incorporate kettlebell movements into my home gym routine sooner.
All strength training modalities (bodyweight, barbell, dumbbell, etc…) will help you build your strength. All have their advantages and disadvantages, and everyone has their own preference on which tool to select. Like all other modalities, if strength is your goal, the kettlebell will get you there.
What’s unique about the kettlebell is its utility and applicability. The kettlebell takes the scalability of dumbbells, adds the power movements of barbells, and keeps the portable benefits of bodyweight training, to create an altogether very unique and effective type of strength training tool. It’s the versatile Swiss army knife, the ideal tool for a minimalist home gym.
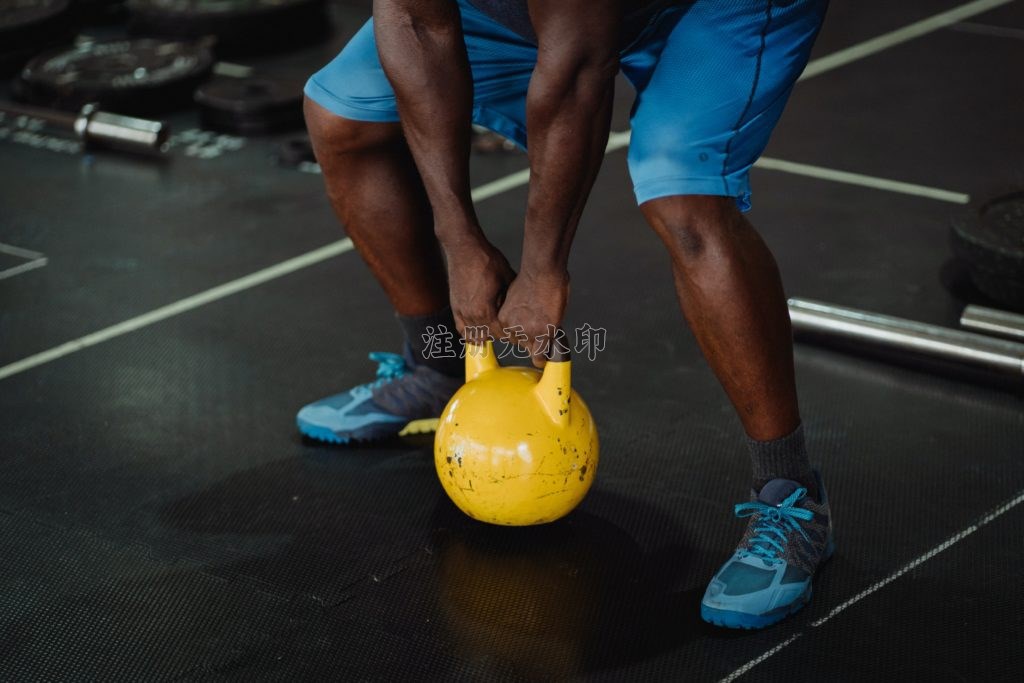
Your introduction to the kettlebell should begin with these six movements. The Layman’s Fitness Video page has videos, instructions, and tips for each movement:
All of these movements use your entire body and move your joints within their ranges of motion. Your legs, core, arms, chest, and back are engaged in each of these movements, which means you can build strength across all areas of your body in each and every kettlebell workout.
There are honorable mentions beyond these six (around the worlds, halo’s, thrusters, overhead squat, etc…), but the mechanics taught by these six movements lay your foundation for all other kettlebell movements.
The compound nature of most kettlebell movements means you can get more work done in less time. But a well-constructed kettlebell program applies the efficiency of compound movements with a plan design that strategically creates effectiveness as well as efficiency.
The best example of this is Pavel Tsatsouline’s Simple & Sinister program (this is an affiliate link, and as an Amazon Associate I earn on qualifying purchases, but I cannot recommend this book enough!)
This program only uses two of the six movements mentioned above: the Swing, and the Get-Up. The program prescribes 100 swings and 10 get-ups almost daily, until you can finish 100 swings in 5 minutes and 10-getups in 10 minutes with a 32kg bell (“Simple” standard), and then the same time targets with a 48kg bell (“Sinister” standard).
This program is the definition of time efficient. Each session takes 20-30 minutes, and with 4-5 days a week, I was only training 80 – 150 minutes a week while building seriously functional strength.
Dumbbells come in pairs. Barbells and their plates require a large amount of space. Squat racks and benches quickly fill up a garage or basement.
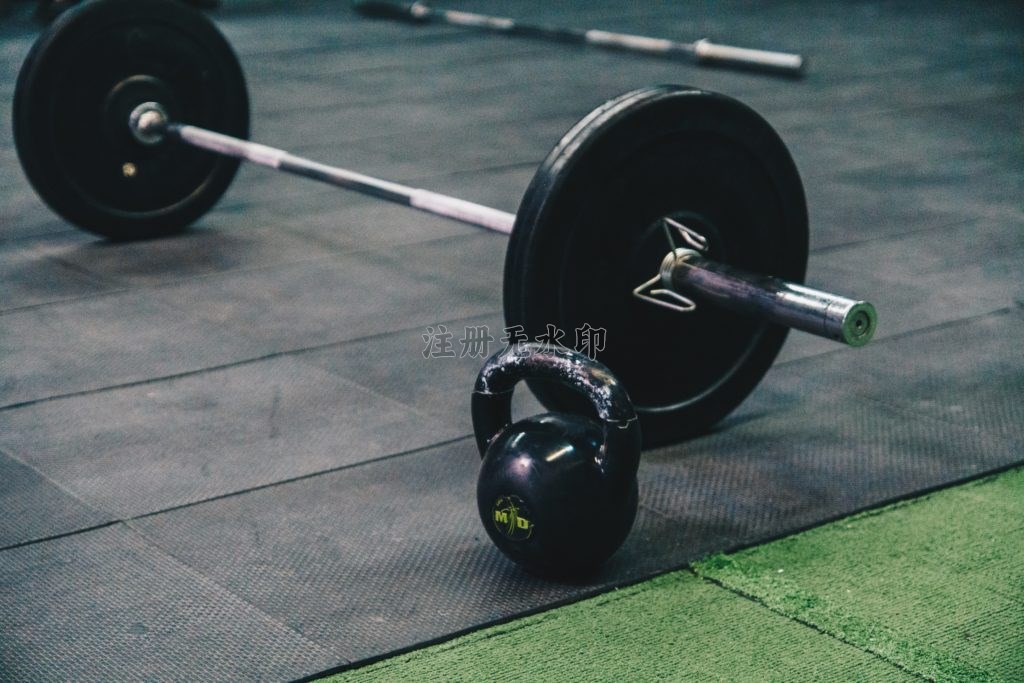
Kettlebells provide the luxury of only taking a small square footage of your home. They can be tucked under your bed, stashed in a corner of your room, line a small portion of your wall in your garage, or fill a small rack in your home gym.
You always have the option to double up your kettlebell in a pair, but in my opinion it’s not necessary, especially at the beginning. You can save yourself space as you build your strength and home gym with the kettlebell.
Kettlebells can be transported and used in just about any location. You can take them to your local park, on the beach, on a mountain, in your living room, etc… This affords you the opportunity to take your gym with you anywhere you can drive.
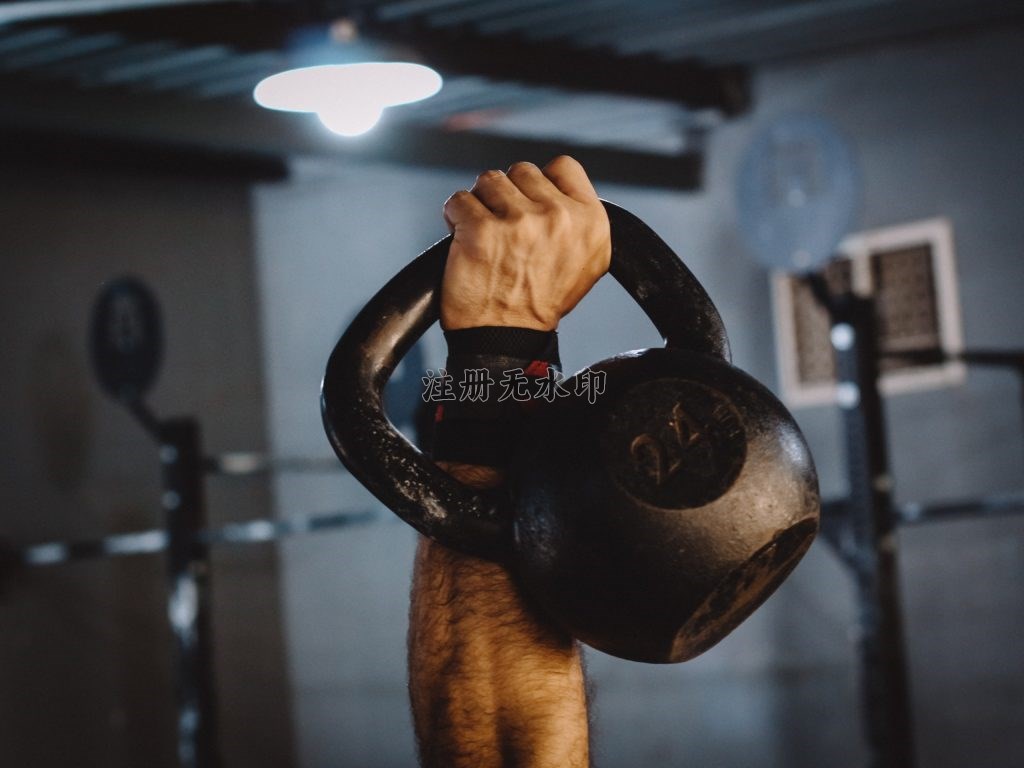
All kettlebell movements will require you to hold that piece of iron with your hands. While you swing it, clean it, press it, snatch it, or carry it, your grip is developed through those multi-planar movements. The kettlebell strengthens the muscles in your fingers, hands, wrists, and forearms, giving you the functional strength of a tight grip.
If I’m honest, one of my least favorite things about exercise is the monotony of movement. Standing still while doing curls, putting a barbell on my neck while going down for a squat, or laying on my back doing a bench press all served to build strength, but the movements felt disconnected from “real life”.
After I started kettlebell training, it wasn’t long before I noticed the small correlations between kettlebell movements and everyday life… picking up one of my kids (Clean), hinging down to pick up something from the floor (Swing), putting a heavy object on a shelf over my head (Get-up, Press), carrying groceries or a suitcase (Farmer’s Walk) etc… While of course the kettlebell does not precisely mimic our everyday movements, the closer connection actually made me enjoy my training sessions more.
This is a tool worth investing in! Give it a try, build some skills and build some strength.


